Feathers in Our Nest

a blog about faith, family, food, & more written by a wife and stay at home mom of five

  • Home
  • About
  • Recipes

How to Convert a Lily Jade Bag to the Backpack Carry

July 29, 2016 by Aliesha

LilyJadeElizabethCamel7

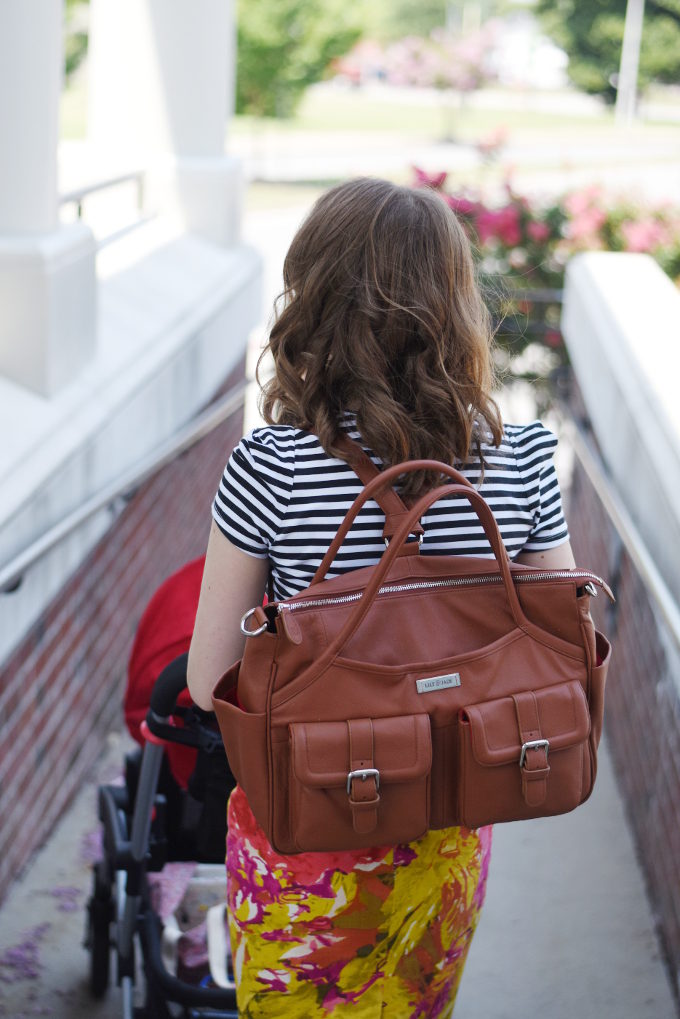
As I promised in my post earlier today (go here to read it if you missed it!), I will show you how to convert your Lily Jade diaper bag to the backpack carry!  This particular anchoring method keeps the straps in place and makes it easier to put the bag on without anything sliding around.  Ah! This is fantastic! How to anchor the Lily Jade bag as a backpack. SO helpful! | Feathers in Our Nest

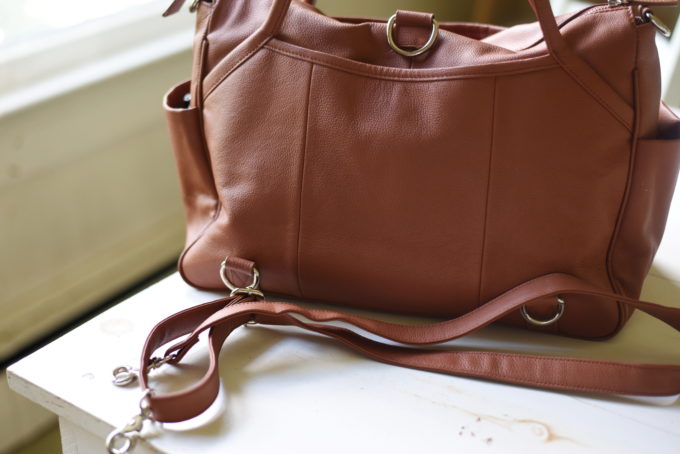
1 – Lengthen the strap

Extend the strap so that it will be long enough to form the backpack straps
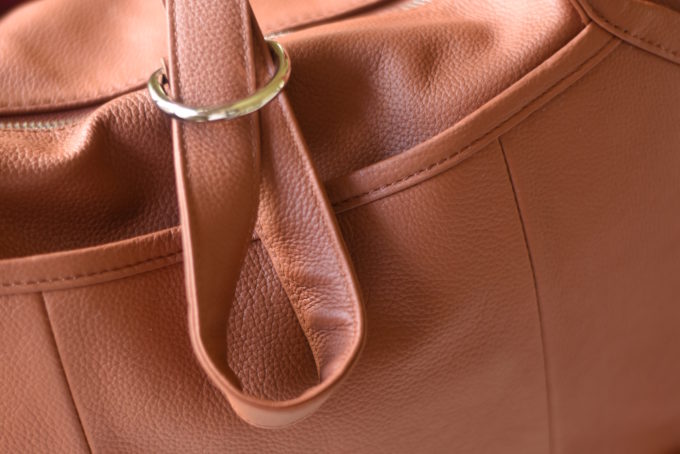
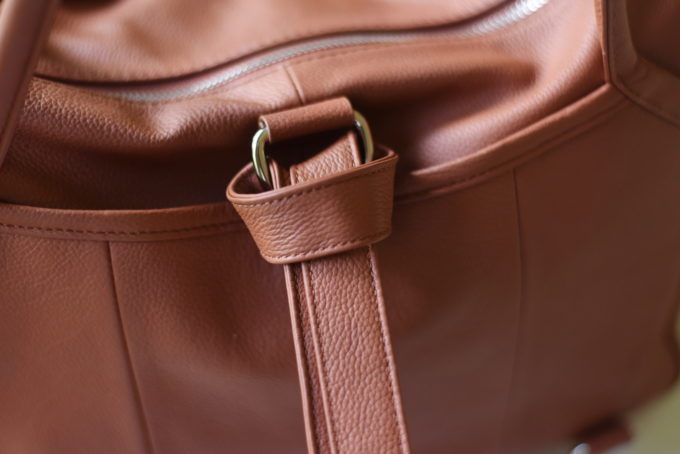
LilyJadeElizabethCamel17

2 – Insert the loop

Fold the strap in the middle, then insert the loop down through the middle D-ring.

LilyJadeElizabethCamel18

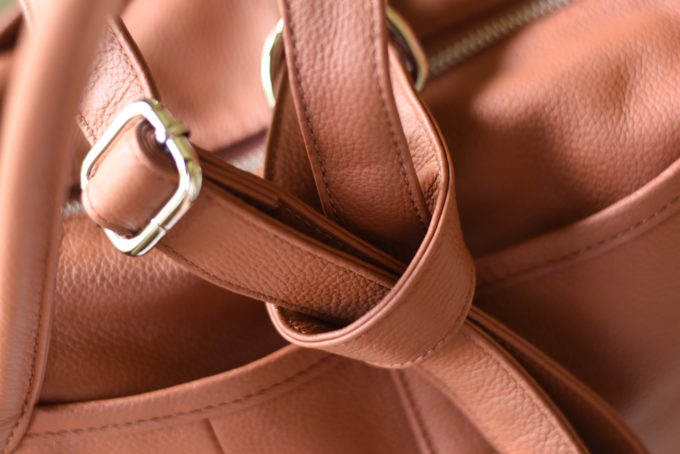
3 – Loop the tail through

Loop the ends of the strap down through the loop, taking care to keep the two ends the same length.
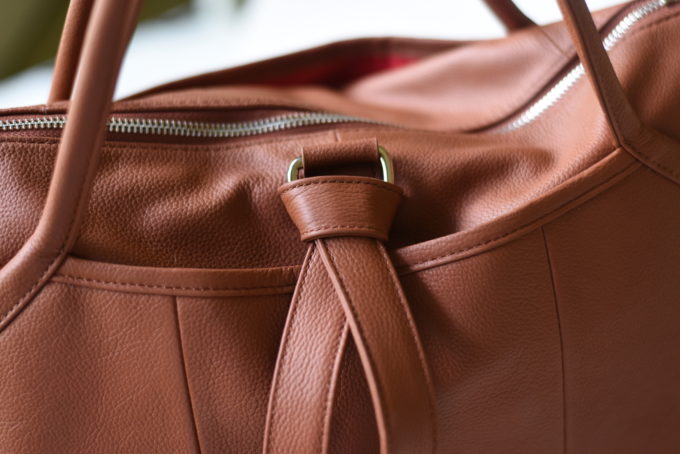
LilyJadeElizabethCamel19

4 – Tighten

Pull gently to tighten the loop.
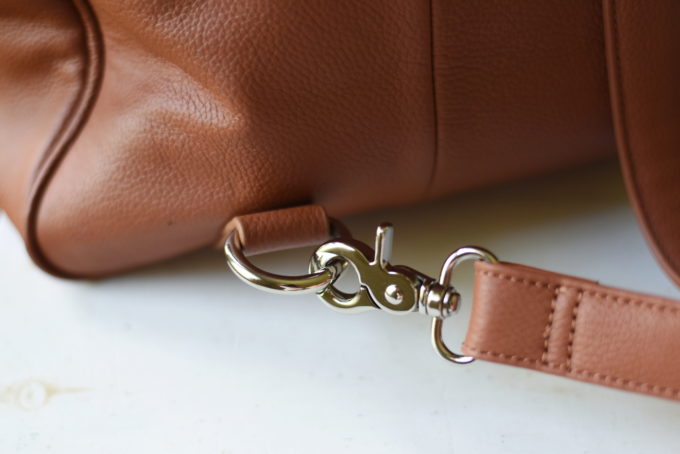
LilyJadeElizabethCamel20

5 – Clip

Attach the ends of the strap to the bag at the two bottom D-rings using the claw clips.

LilyJadeElizabethCamel21

6 – Adjust

Tighten, loosen, or adjust the loop as needed so that the straps are even and the straps lay flat.
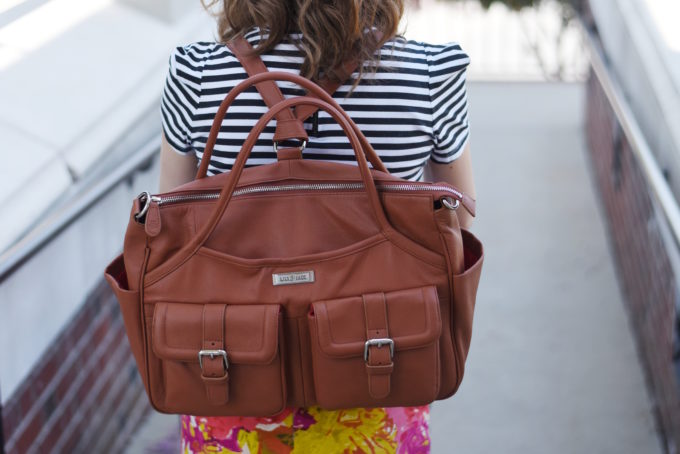
LilyJadeElizabethCamel8

7 – Ta-da!

Swing it on your back and enjoy the backpack carry!

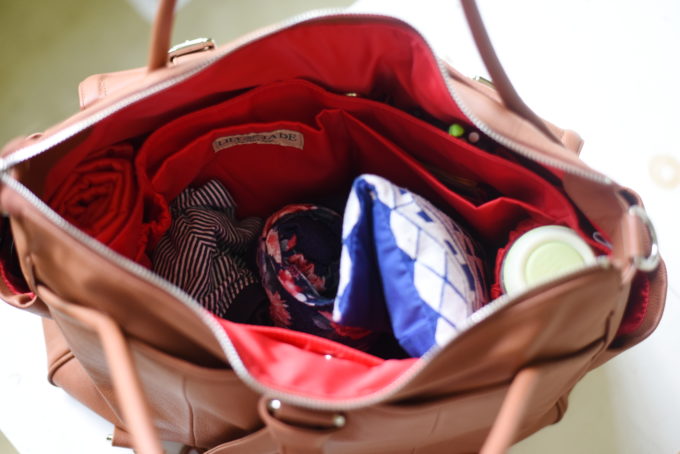
Finally, I wanted to share a couple of interior shots of this particular bag so you can see just how much room it has!

LilyJadeElizabethCamel22

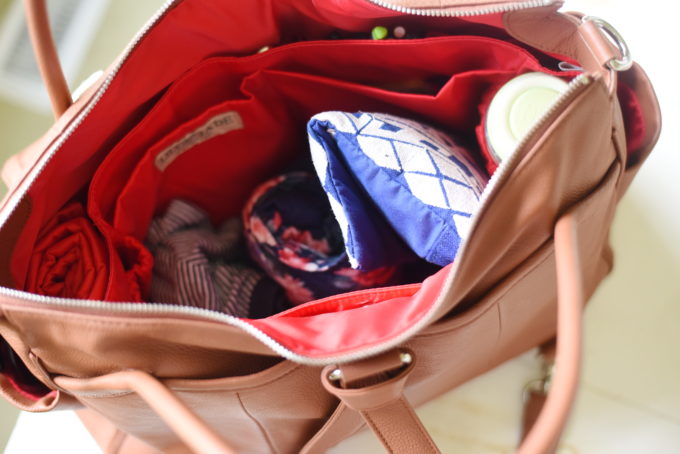
Tons of big, roomy pockets, a cheery interior, and a washable baby bag insert.  What’s not to love?

LilyJadeElizabethCamel23

You can find out more about Lily Jade bags right here!

Feel free to pin this image for reference! Lily Jade Elizabeth in Camel Backpack Carry Technique

Filed Under: baby, fashion, step-by-step

DIY Travel Bags: To Wear & To Wash {Gift Idea!}

July 27, 2016 by Aliesha

DIY Gift Idea: Travel Bags - To Wash & To Wear! | Feathers in Our Nest
I’ve been eyeing these travel bags for a while and wanting to make some of my own!  Aren’t they perfect for travel?  You tuck your clean underthings in one, and then as the trip progresses, transfer them to the other one.  This makes it so easy to keep everything separated in your luggage.  This weekend, I took a few minutes to make a set of my own!

First I grabbed these bags (more than you need, so you can make extras to give as gifts!) and a fabric marker (from Target in the craft department, but this set is similar to the one I bought).DIY Gift Idea: Travel Bags - To Wash & To Wear! | Feathers in Our Nest

You can print out the text in a favorite font to use as inspiration.  (Left: Harlems Font. Right: Wanderlust.)  I used these for reference but put my own twist on the letters!

Place a small piece of cardboard inside the bag so the ink doesn’t bleed through to the other side.  Then write “to wear” on one and “to wash” on the other.DIY Gift Idea: Travel Bags - To Wash & To Wear! | Feathers in Our Nest

Tip: Use the bullet point end of the fabric marker to do faux calligraphy (as pictured). Write the words, then thicken each down stroke to give it that calligraphy or brush pen look.  DIY Gift Idea: Travel Bags - To Wash & To Wear! | Feathers in Our Nest

DIY Gift Idea: Travel Bags - To Wash & To Wear! | Feathers in Our Nest

Check the fabric marker packaging for washing instructions.DIY Gift Idea: Travel Bags - To Wash & To Wear! | Feathers in Our Nest
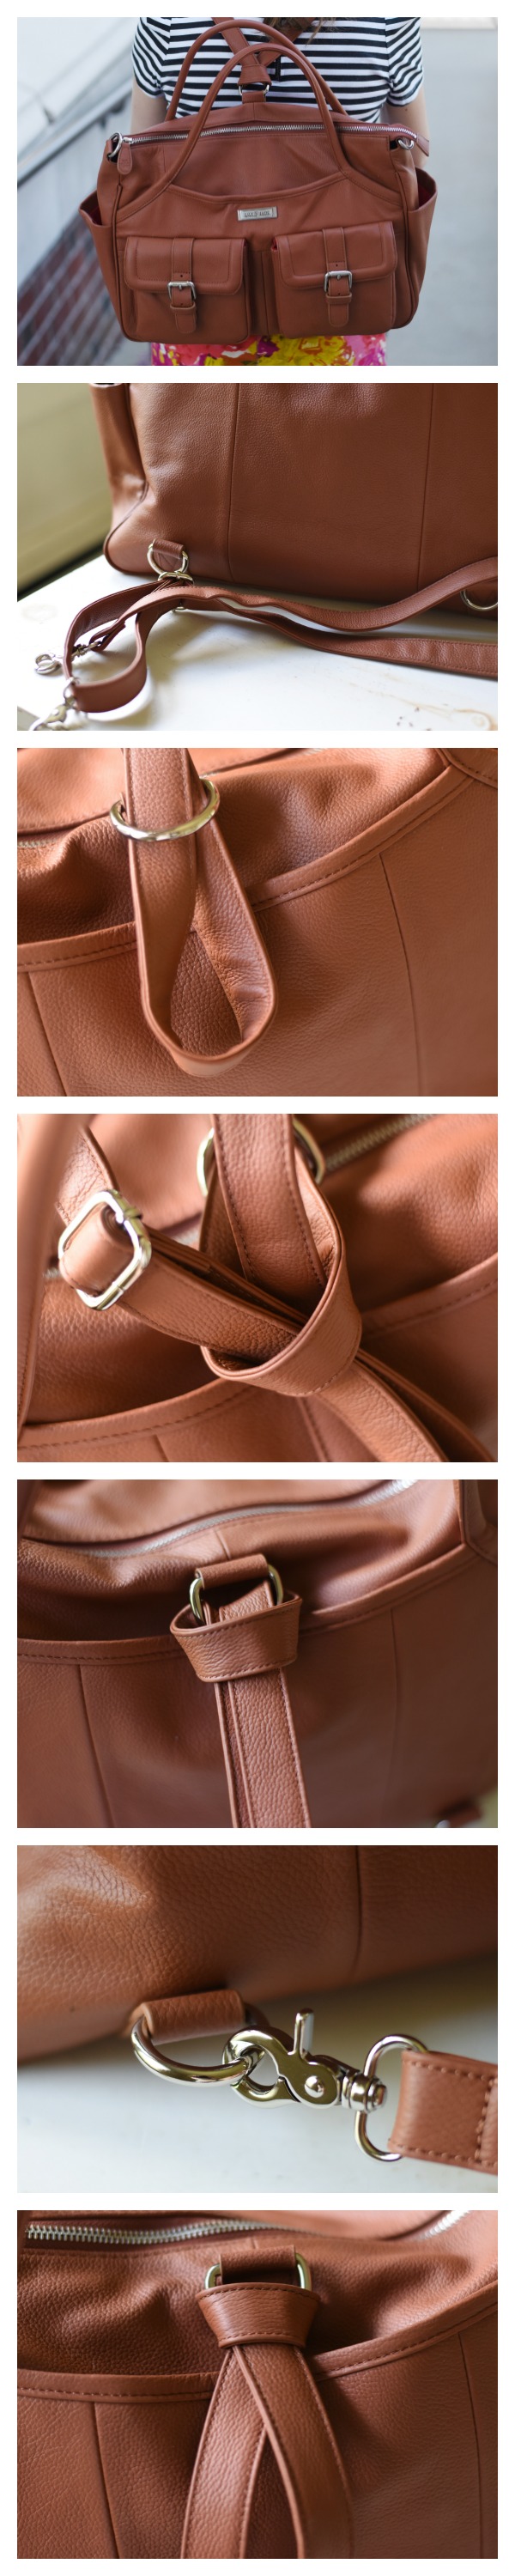
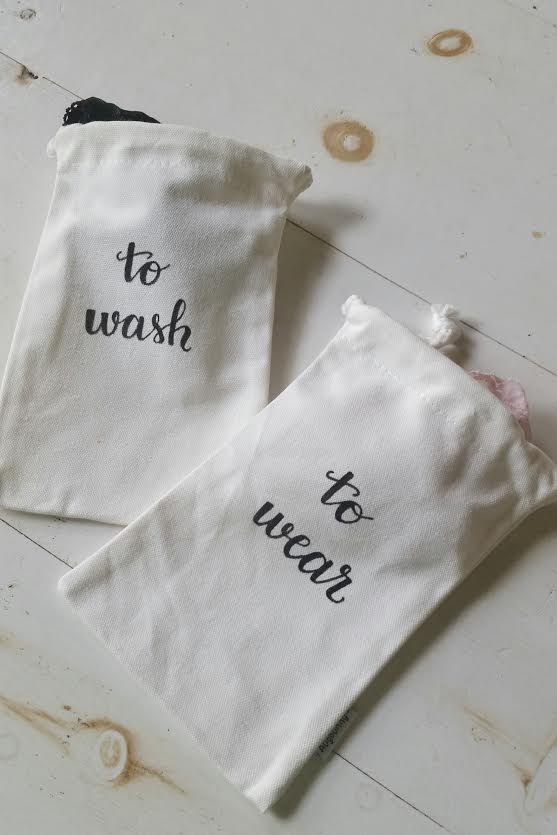
These would make nice gifts for a girlfriend who loves to travel!
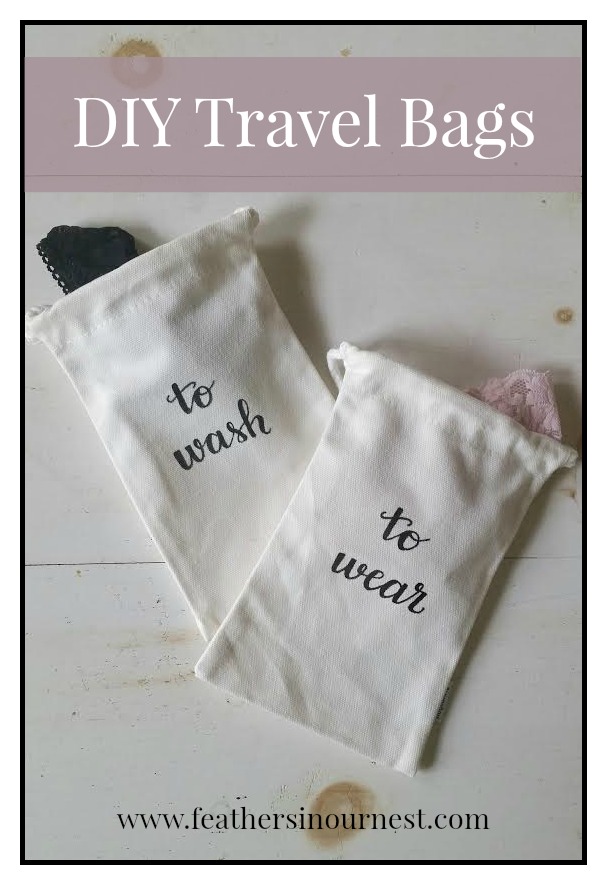
Other phrases to write on your bags: “bits and baubles,” “hair thingies,” “socks,” “chargers & earbuds,” and “this and that.”

Let me know if you make any!

DIY Travel Lingerie Bags with Brush Lettering: To Wear & To Wash {Gift Idea!} | Feathers in Our Nest

Aliesha Caldwell is a participant in the Amazon Services LLC Associates Program, an affiliate advertising program designed to provide a means for sites to earn advertising fees by advertising and linking to amazon.com.

Filed Under: gift ideas, gifts, projects, step-by-step

How To Brew the Perfect Cup of French Press Coffee

November 1, 2013 by Aliesha

Enjoy today’s guest post by Tad! –Aliesha


You know the taste of that first pot of coffee made from a freshly opened can of grounds? It is always so delicious, but over time the flavor tends to get stale and old. In my pursuit of being able to make a cup of coffee that tasted as good as that first pot, I discovered the French press method, which is a method of making freshly ground coffee that tastes even better than that first pot. It can make a strong, smooth cup of coffee without any bitterness.

French press coffee is made using a coarser grind than a standard drip pot. Because of this, it is import to grind your coffee at home. Grinders can be purchased for around $20. We use a hand-cranked burr grinder instead of an electric blade grinder because it achieves a more even grind. Freshly ground coffee tastes significantly better than coffee that is ground and then stored for a length of time.

Here is how to brew the perfect cup of French press coffee.

When making French press coffee (or any method of brewing, for that matter), it is best to grind your coffee immediately before brewing.

Things you need:
whole bean coffee
coffee grinder
measuring spoon
measuring cup
pot or tea kettle
French press (we use the Bodum Brazil)
wooden or plastic spoon

How to:
Grind your coffee. You should use 2 Tbsp. of coarsely ground coffee for each cup of water.  I usually make three cups of water and 6 Tbsp.

Heat water on a stove in either a pot or a kettle. The water should not be boiling, but instead should be between 195 and 205 degrees. Typically it is around the right temperature the first moment a tea kettle makes a peep (before it is “shrieking”). Alternately, you can use an instant read thermometer after water has been brought to a boil. Track the time it takes to drop to 205 degrees after is has been removed from the heat so you don’t have to use the thermometer every time.

Place the ground coffee in the bottom of the French press and the water poured on top. Stir the coffee. Place the lid on the press, leaving the filter above the surface of the coffee.

Brew the coffee for about 5 minutes, and then press the plunger straight down. If you don’t push it straight, you may get grounds in your coffee.

Even after being pressed the coffee may continue to brew, so pour your coffee into a mug to enjoy immediately.

Enjoy!

Aliesha Caldwell is a participant in the Amazon Services LLC Associates Program, an affiliate advertising program designed to provide a means for sites to earn advertising fees by advertising and linking to amazon.com.

Filed Under: beverages, cooking, food, step-by-step, Tad

  • 1
  • 2
  • 3
  • …
  • 8
  • Next Page »
  • Email
  • Facebook
  • Instagram
  • Pinterest
  • RSS
  • Twitter
About Us

This blog shares our family's story and our journey from newlyweds to a family of seven. We share milestones, we share struggles, we share sweet memories, and we share about our Savior. Keep reading...

FACEBOOK

NEWSLETTER

Subscribe to our super-fun weekly newsletter! Enjoy exclusive content & fun bonuses!

* indicates required

Archives

INSTAGRAM

PINTEREST

Visit Aliesha @ Feathers in Our Nest's profile on Pinterest.

Popular Posts

newborn sleep routine

10 Tips for Establishing a Newborn Sleep Routine

What I Buy at Aldi

What I Buy at Aldi {Real Food}

essential oil blends

Essential Oil Blends – What Works for What?

DIY Citronella Candles {Keep Mosquitoes at Bay!}

Dream Diaper Bag: Review of Lily Jade Shaylee

Baby Basics: Guide to the Products I Love

Perfect Cold Brew Coffee at Home! Easy DIY recipe using a French Press | Feathers in Our Nest

Perfect Cold Brew Iced Coffee

See Other Popular Posts...

About Feathers in Our Nest

At Feathers in Our Nest, you can expect to find delicious recipes, homemaking tips, practical advice for frugal living, resources for those who are in ministry, inspiring links, and cute photos and stories about our children. You can browse older posts by checking out the Tips & Tutorials Page or the Recipes Page. Thanks for visiting! Read More…

  • Email
  • Facebook
  • Instagram
  • Pinterest
  • Twitter

Recent Posts

Easter Family Devotions | Feathers in Our Nest
Gospel Centered Books for Older Kids | Feathers in Our Nest
Gospel Centered Family Devotionals | Feathers in Our Nest
Gospel Centered Story Bibles | Feathers in Our Nest
Gospel Centered Picture Books | Feathers in Our Nest

Popular Topics

baby baking whole grains birthdays books bread breakfasts Christmas cooking Cordelia crafts deals decorating desserts essential oils everyday fall family food friends frugal living giveaways health and beauty healthy eating holidays homemaking hospitality house Jude main dishes marriage menu monday milestones ministry parenting photography pregnancy projects recipes reviews she {hearts} it sponsored Tad travels Vera worth repeating

Copyright © 2025 · Foodie Pro Theme by Shay Bocks · Built on the Genesis Framework · Powered by WordPress

Sign up below to join the Feathers in Our Nest email list!
Every Friday, you'll get exclusive content: the latest posts, recipes, photos, & more!
Your information will never be shared or sold to a third party.