Feathers in Our Nest

a blog about faith, family, food, & more written by a wife and stay at home mom of five

  • Home
  • About
  • Recipes

Silk Dyed Easter Eggs

March 27, 2018 by Aliesha

Silk Dyed Easter Eggs | Feathers in Our NestToday we made some beautiful silk dyed Easter eggs, so I thought I’d do a quick post about the process!

Silk Dyed Easter Eggs | Feathers in Our Nest

Silk Dyed Easter Eggs | Feathers in Our NestYou’ll need some old silk ties you don’t care about anymore! I found a bunch at Goodwill for just $.50 each. They need to be 100% silk to work for this project!Silk Dyed Easter Eggs | Feathers in Our Nest

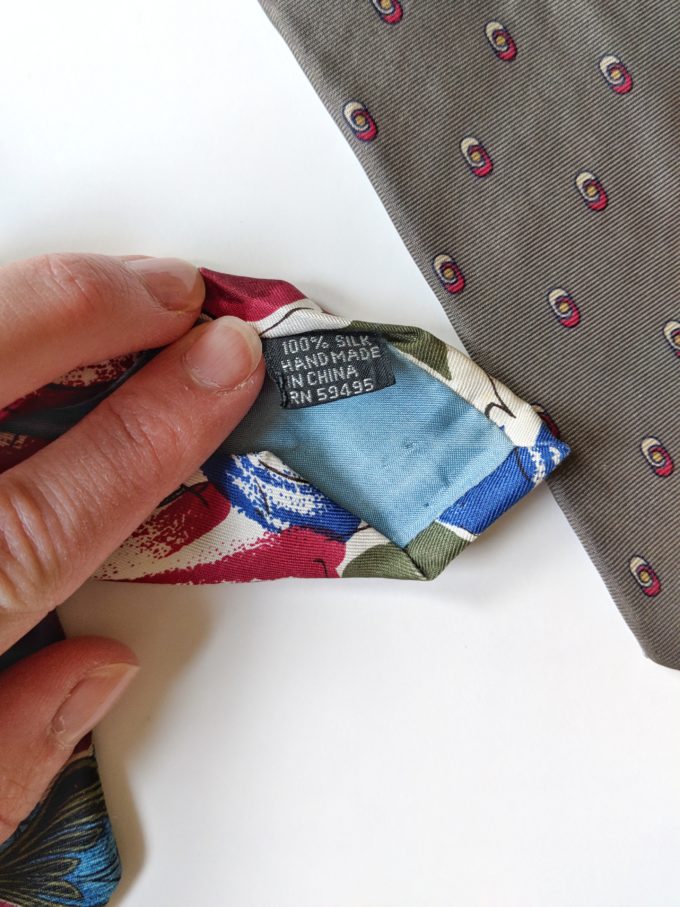
You’ll also need some white fabric, such as an old pillowcase or an old flour sack towel. Finally, you’ll need some twist ties (or twine), fabric scissors, and 1/4 cup white vinegar.

Silk Dyed Easter Eggs | Feathers in Our Nest
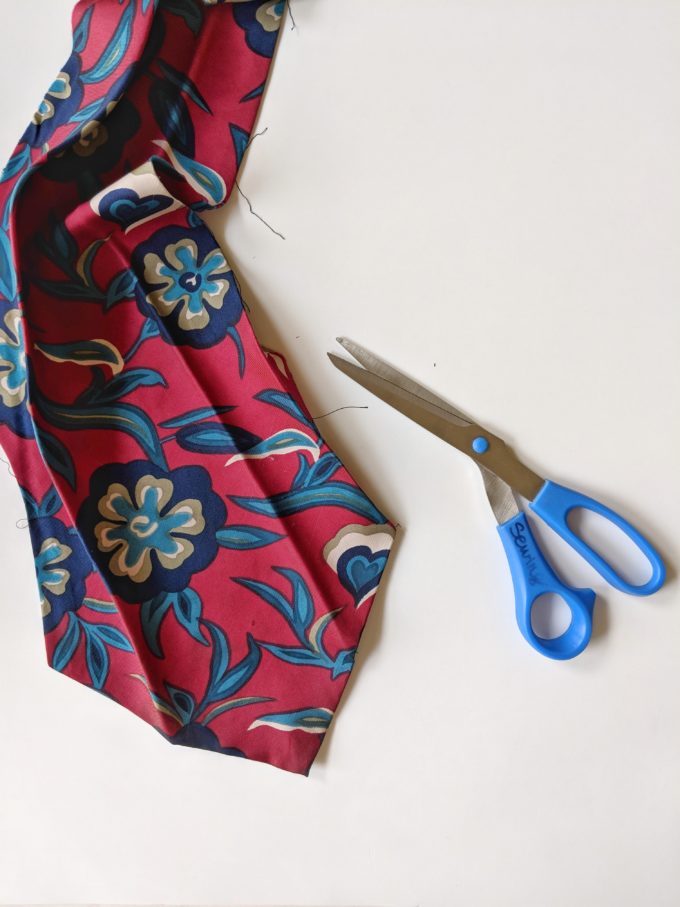
Start by cutting your ties open and cutting a square for each egg.

Silk Dyed Easter Eggs | Feathers in Our Nest
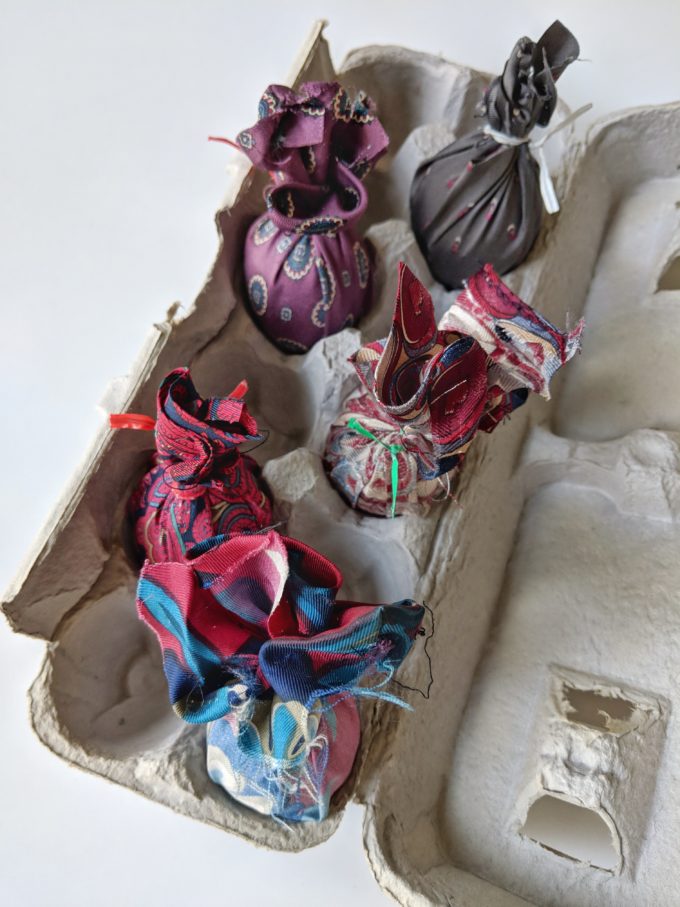
Wrap your eggs (straight out of the fridge, not already boiled) in the silk with the right side of the fabric touching the egg. Pull it around tightly! Secure with a twist tie it piece of twine. Repeat with all eggs.

Silk Dyed Easter Eggs | Feathers in Our Nest
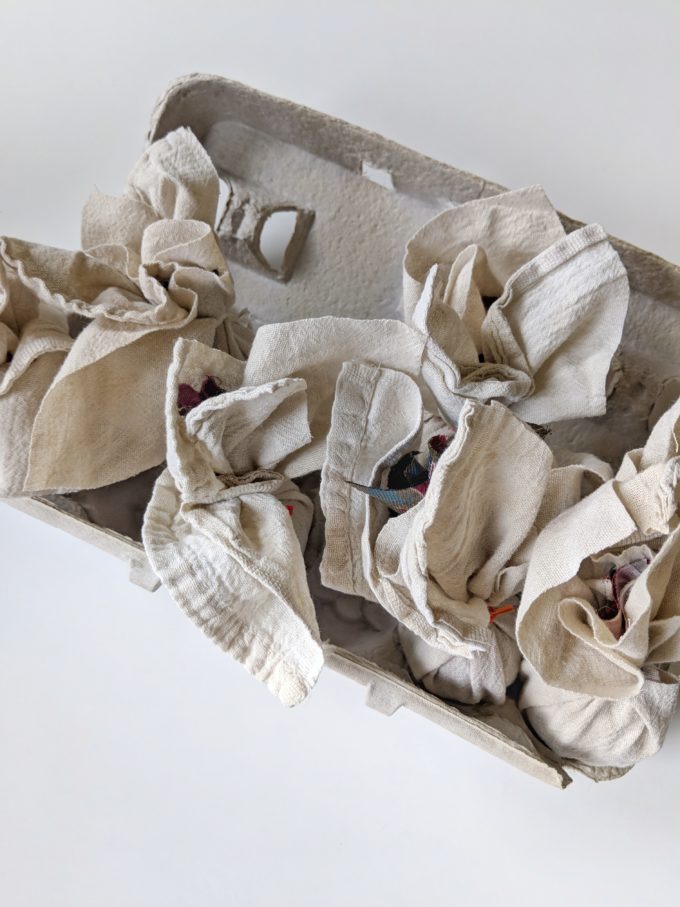
Next, wrap all the eggs the same way, but this time in white fabric to help prevent colors from bleeding. Secure with a twist tie or piece of twine.

Silk Dyed Easter Eggs | Feathers in Our Nest
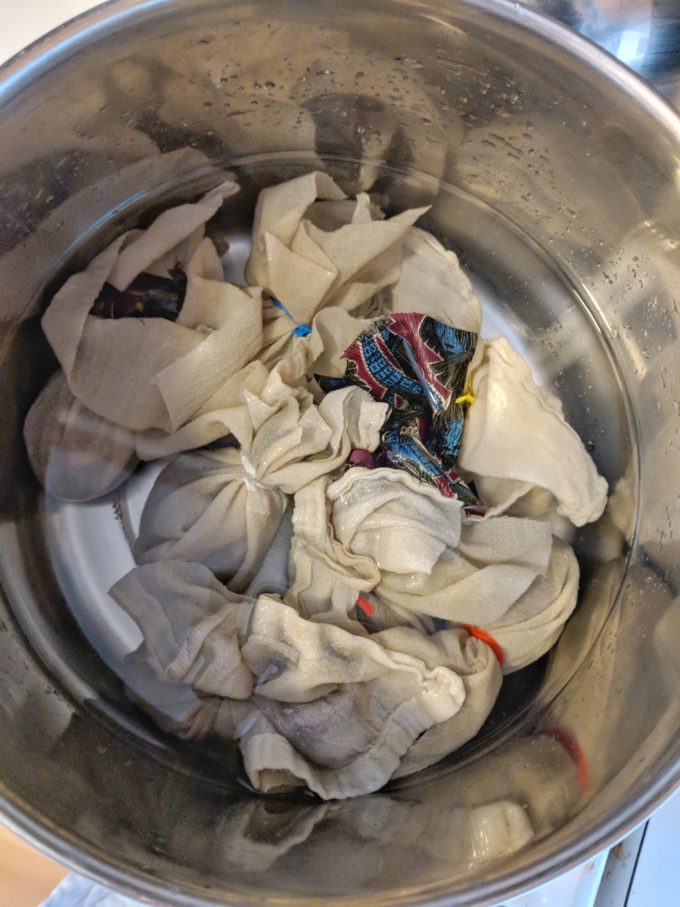
Place eggs in a large pot and cover with cold water. Add 1/4 cup white vinegar to the pot. Bring to a boil, then set a timer for 20 minutes. After 20 minutes, place eggs (still wrapped) in a colander to cool.

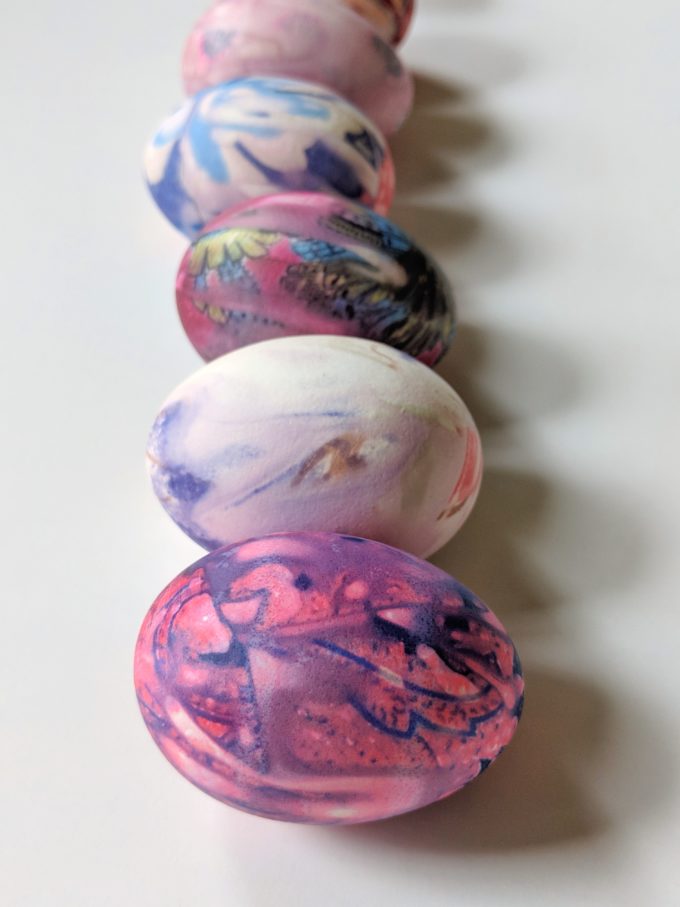
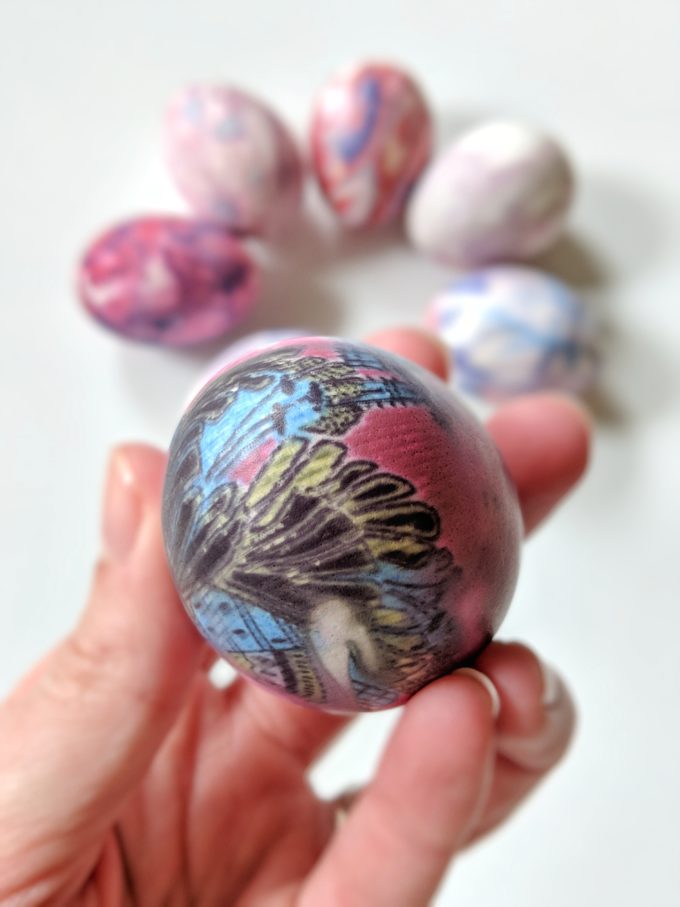
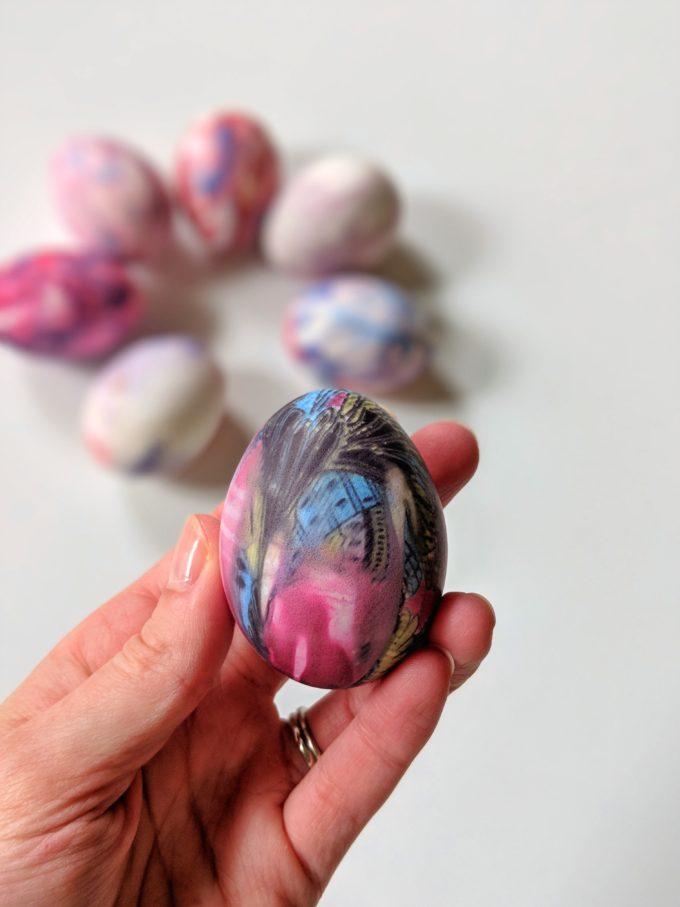
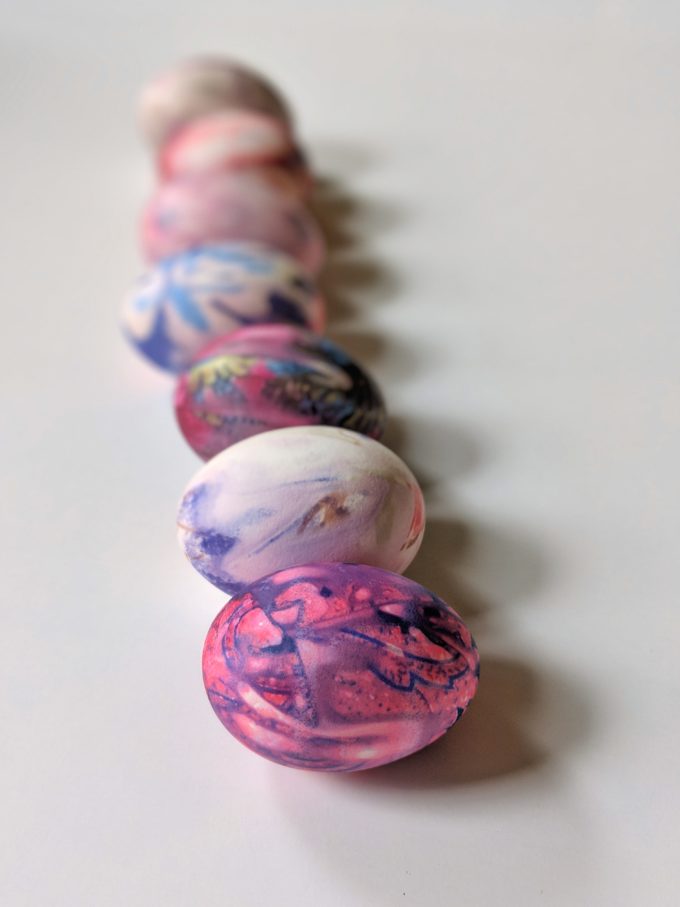
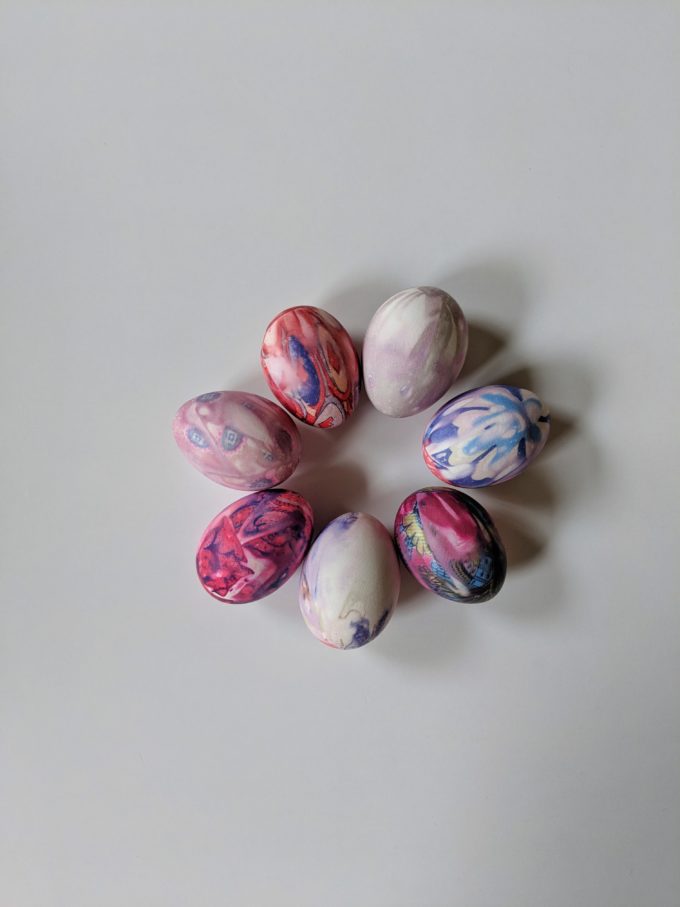
When cool, unwrap your eggs and be surprised at how cool they look!

Some ties will result in more vibrant eggs, and some will result in pastel/watercolor eggs! You won’t know until you try!

Silk Dyed Easter Eggs | Feathers in Our Nest

Silk Dyed Easter Eggs | Feathers in Our Nest

Silk Dyed Easter Eggs | Feathers in Our Nest

Let us know if you try making these!

Silk Dyed Easter Eggs | Feathers in Our Nest

Original idea and directions came from Our Best Bites!

Filed Under: crafts, holidays

DIY Fragrance Sticks {Using Your Favorite Essential Oils!}

May 29, 2015 by Aliesha

Make your own fragrance sticks (solid perfume) using your favorite essential oils or blends! Three simple ingredients and easy to make! | Feathers in Our Nest

Today I wanted to share another fun way to use the essential oils you have in your “stash”!  Making personal fragrance sticks (or solid perfume, as some call it) couldn’t be easier.  Simply choose your favorite essential oil or a blend of oils and whip up these fragrance sticks in a few minutes!  While they look like lip balm, they are intended to be applied to your neck, wrists, or behind your ears as a light personal perfume.

When I made these to give away as a gift, I used Blend of Jasmine for a pleasant floral scent.  You can use many different oils!  I recommend starting with an oil or blend that you love the fragrance of and have used topically before with no problems (skin irritation, etc.).

Here are a few suggestions:
–Bergamot
–Pink Grapefruit
–Lavender
–Blend of Jasmine
–Citrus Blend
–Blend of Vanilla
–Calming
–Citrus Passion
–Sonata
–Peace and Quiet

These make great little gifts (and you could plan ahead to make stocking stuffers!).  They are super cute to enclose with a birthday card.

I used white beeswax when I made these, but if you use yellow beeswax (which is totally fine), the sticks will be a light yellow color.  You can also use sweet almond oil in place of the olive oil if you prefer.

This recipe yields 5 sticks, but you can easily double or triple the recipe to make more!

DIY Fragrance Sticks {Using Your Favorite Essential Oils!}
 
Print
Easily make these fragrance sticks so you can carry your personal perfume with you anywhere you go! Use your favorite essential oil or blend to customize it for you.
Author: Aliesha @ Feathers in Our Nest
Serves: 5 sticks
Ingredients
  • 1 Tbsp. olive oil
  • 1 Tbsp. + 1 tsp. beeswax pellets (white or yellow)
  • ¼ tsp. essential oil
Instructions
  1. Prepare empty lip balm containers by opening the lids and standing them on their ends. Group together and secure with a rubber band. (Alternatively, you can use tiny round tins.)
  2. Place olive oil and beeswax in a glass Pyrex measuring cup OR a mason jar and set it inside a saucepan on the stovetop filled with an inch or two of water. (The advantage of the measuring cup is the pouring spout!)
  3. Heat the saucepan over medium heat and stir the contents of the glass measuring cup or mason jar until melted and combined.
  4. Remove from heat and add essential oil(s).
  5. Immediately pour into empty tubes, working quickly as it will harden rapidly.
  6. Allow to cool, then label or package! (You don't want to get confused and think they are lip balms!)
3.3.3074

Sources: beeswax pellets  |  essential oils  |  lip balm tubes

Make your own fragrance sticks (solid perfume) using your favorite essential oils or blends! Three simple ingredients and easy to make! | Feathers in Our Nest

Let me know if you make these!  I’d love to hear what essential oils you use!

Make your own fragrance sticks (solid perfume) using your favorite essential oils or blends! Three simple ingredients and easy to make! | Feathers in Our Nest

Disclosure: Some of the links in this post are affiliate links.  If you choose to make a purchase through my links, it will help support this blog and my family. Thank you!

ALIESHA CALDWELL IS A PARTICIPANT IN THE AMAZON SERVICES LLC ASSOCIATES PROGRAM, AN AFFILIATE ADVERTISING PROGRAM DESIGNED TO PROVIDE A MEANS FOR SITES TO EARN ADVERTISING FEES BY ADVERTISING AND LINKING TO AMAZON.COM.

Filed Under: crafts, essential oils, gift ideas, health and beauty, projects

Are You Creative?

January 14, 2015 by Aliesha

??????????????????????????????Are you creative?  Of course you are!  Everyone is, but just in different ways.  I love craft projects and cooking and blogging … but some of my other friends are creative through their teaching style, sewing abilities, musical talent, or giftedness as writers.  We all have God-given creativity and we just need to nurture it!

I just signed up for a mini course that will come to my email inbox each day for four days.  This course is designed to teach you the four steps to rediscover your creative genius and help you connect with your creative side (yes, you have one!).

This four-part course comes with supporting worksheets and has been created by the Ultimate Bundles team (I’ll tell you more about them soon!). It’s delivered entirely over email and only takes a week, so you really have no excuse!

The course will help you figure out what you enjoy creating, how to find the time to do it, how to not feel guilty about indulging in your creative pursuits, and how to distance yourself from that dreaded ruiner of fun: Perfection.

This mini course will be awesome… and I can’t wait to see what creativity in inspires!  It’s completely free, so you don’t have anything to lose by signing up!

Here’s the best part of this … if you refer 5 friends to this free mini course, you’ll receive a free one-year subscription to Better Homes & Gardens magazine!  And if you refer 10 friends to sign up for the course, you’ll receive a FREE Ultimate DIY Bundle (which is coming really, really soon)!  If you only sign up one other friend for this course, you’ll still get $5 off your bundle if you choose to buy one!  You can share your referral link through social media or email.  It’s really easy to get enough referrals to earn a free bundle!

Spoiler alert: The Ultimate DIY Bundle is really good… I’ve seen the huge list of resources included, and you’re going to love this one!

Unleash your inner creativity today and sign up for the 4-part email course!

Disclosure: This post contains my affiliate link. When you click on my affiliate links, it helps support my family and this blog. Thank you!

Filed Under: crafts, deals

  • 1
  • 2
  • 3
  • …
  • 16
  • Next Page »
  • Email
  • Facebook
  • Instagram
  • Pinterest
  • RSS
  • Twitter
About Us

This blog shares our family's story and our journey from newlyweds to a family of seven. We share milestones, we share struggles, we share sweet memories, and we share about our Savior. Keep reading...

FACEBOOK

NEWSLETTER

Subscribe to our super-fun weekly newsletter! Enjoy exclusive content & fun bonuses!

* indicates required

Archives

INSTAGRAM

PINTEREST

Visit Aliesha @ Feathers in Our Nest's profile on Pinterest.

Popular Posts

newborn sleep routine

10 Tips for Establishing a Newborn Sleep Routine

What I Buy at Aldi

What I Buy at Aldi {Real Food}

essential oil blends

Essential Oil Blends – What Works for What?

DIY Citronella Candles {Keep Mosquitoes at Bay!}

Dream Diaper Bag: Review of Lily Jade Shaylee

Baby Basics: Guide to the Products I Love

Perfect Cold Brew Coffee at Home! Easy DIY recipe using a French Press | Feathers in Our Nest

Perfect Cold Brew Iced Coffee

See Other Popular Posts...

About Feathers in Our Nest

At Feathers in Our Nest, you can expect to find delicious recipes, homemaking tips, practical advice for frugal living, resources for those who are in ministry, inspiring links, and cute photos and stories about our children. You can browse older posts by checking out the Tips & Tutorials Page or the Recipes Page. Thanks for visiting! Read More…

  • Email
  • Facebook
  • Instagram
  • Pinterest
  • Twitter

Recent Posts

Easter Family Devotions | Feathers in Our Nest
Gospel Centered Books for Older Kids | Feathers in Our Nest
Gospel Centered Family Devotionals | Feathers in Our Nest
Gospel Centered Story Bibles | Feathers in Our Nest
Gospel Centered Picture Books | Feathers in Our Nest

Popular Topics

baby baking whole grains birthdays books bread breakfasts Christmas cooking Cordelia crafts deals decorating desserts essential oils everyday fall family food friends frugal living giveaways health and beauty healthy eating holidays homemaking hospitality house Jude main dishes marriage menu monday milestones ministry parenting photography pregnancy projects recipes reviews she {hearts} it sponsored Tad travels Vera worth repeating

Copyright © 2025 · Foodie Pro Theme by Shay Bocks · Built on the Genesis Framework · Powered by WordPress

Sign up below to join the Feathers in Our Nest email list!
Every Friday, you'll get exclusive content: the latest posts, recipes, photos, & more!
Your information will never be shared or sold to a third party.