Feathers in Our Nest

a blog about faith, family, food, & more written by a wife and stay at home mom of five

  • Home
  • About
  • Recipes

Natural Treatment for Cradle Cap

March 28, 2012 by Aliesha

Most babies experience cradle cap at some point, and my sweet Cordelia is no exception.

Today I decided to treat her cradle cap, even though I know it doesn’t bother her.  It bothers me a little bit, and I don’t like how random strangers feel free to comment on my baby’s dermatological issues.

Here’s how to naturally treat cradle cap quickly and easily!

You will need:
-warm water
-a soft washcloth
-coconut oil
-a fine-tooth comb or baby nail brush

Make sure your baby is happy and relaxed before starting this process.  Try doing it right after a feeding with your baby in a comfortable position.

Place a washcloth moistened with warm water on the affected area of the baby’s head or forehead.  Gently rub the washcloth over the area to soften the skin.  (Alternatively, you could do this treatment after a bath.)

Apply a small amount of coconut oil on the baby’s scalp or forehead using your fingers.  The heat from your hand will melt the oil.  Massage the oil gently into your baby’s skin.

Using a fine-tooth comb or a baby nail brush, very gently scrape the “scales” off, combing in the opposite direction of the way they are laying.  Wipe away the removed scales using the warm washcloth.

Continue this process until the majority of the scales are removed.  The skin may be slightly red for a little bit after the treatment.

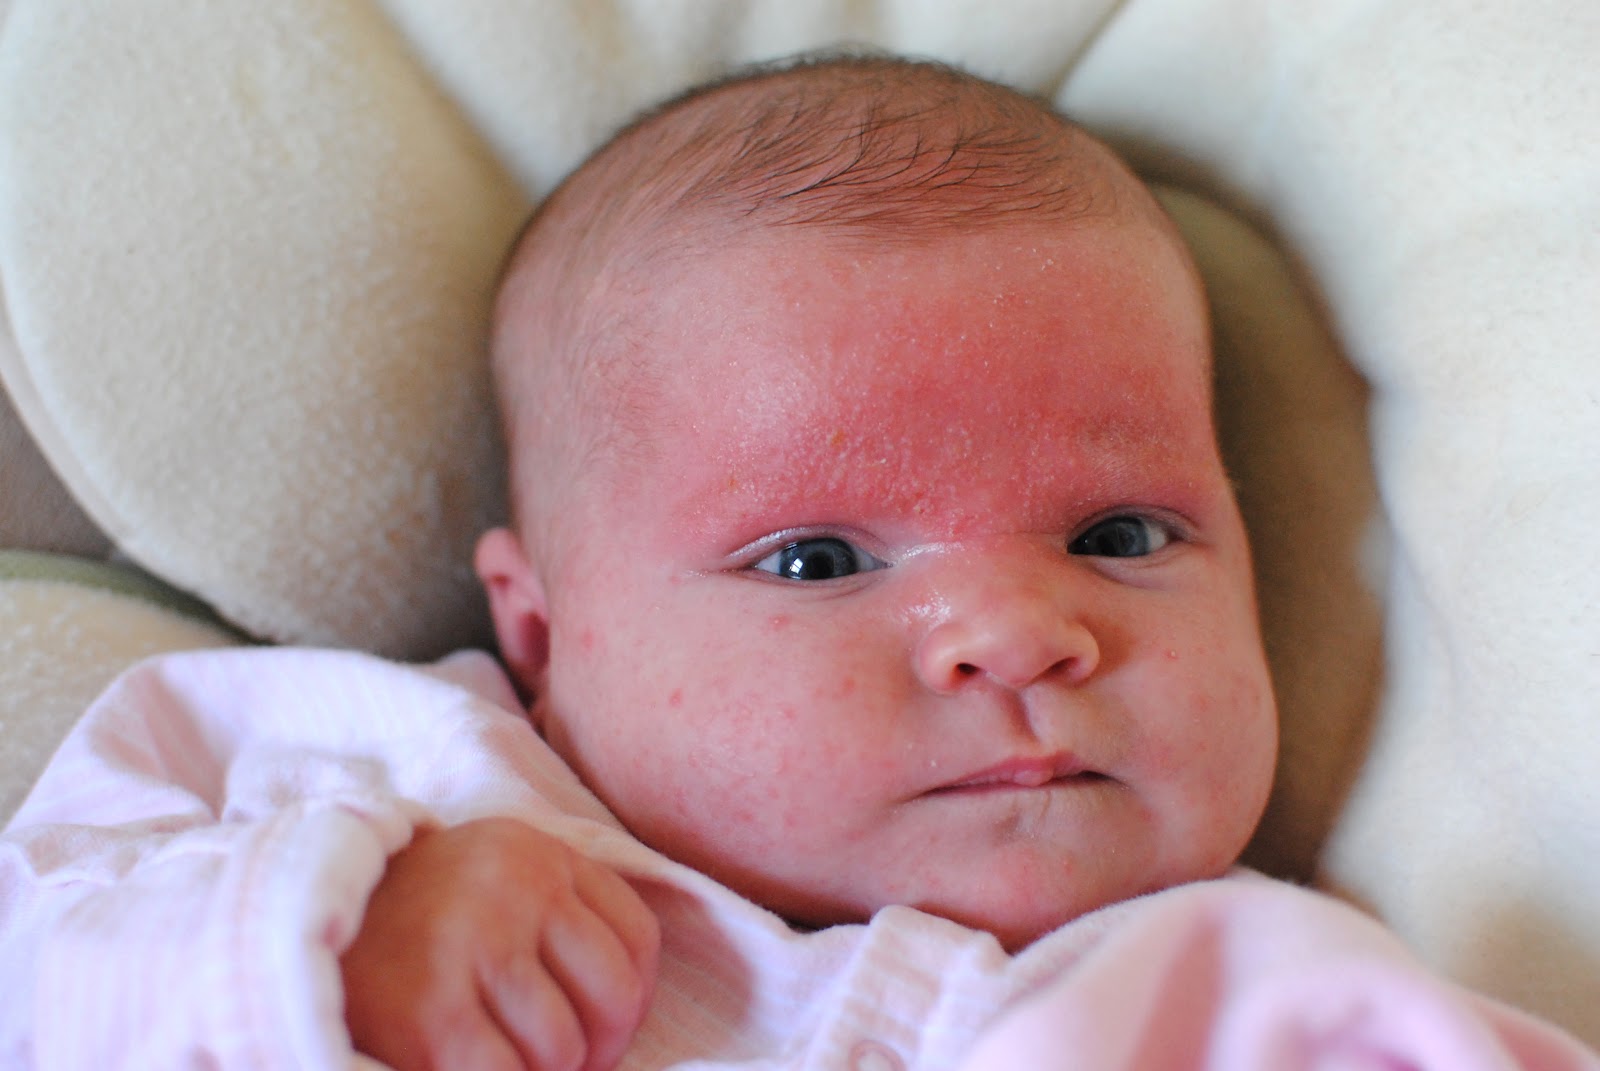
Here you can see a before and after of Cordelia’s cradle cap:

before
after (still not completely better, but much improved!)

I didn’t get all of the cradle cap off with the first treatment, but I will keep working at it.  I still think it looks much better than it did before!

Looking for a great place to buy coconut oil? Try Vitacost! I got a 54 oz. container of organic, extra-virgin coconut oil for about $15 shipped because of the $10 credit you get when you first join! It’s a great deal (cheaper than Amazon).

Filed Under: baby, Cordelia, step-by-step

Pom Flowers: How-To

April 11, 2011 by Aliesha

I can’t take credit for these pom flowers (I learned the technique from Martha!), but I can teach you how to make them too!

1) Stack six to eight sheets of tissue paper (20″x30″ for large poms; cut sheets in half for medium poms).  Starting with the short end of the rectangle, fold accordion-style (1″ to 1.5″ folds), creasing as you go.

2) Cut a piece of floral wire and “tie” the folded stack of tissue paper in the middle.  Using sharp scissors, trim the ends to be either round or pointed.

3) Very carefully, separate each layer from the center.  Fluff the pom so it’s nice and full.

4) Attach thread or monofilament to the wire and hang as desired.

These are perfect for parties, weddings, and showers! 

Filed Under: crafts, parties, step-by-step

Epic 6 Tool/Letterpress Project & Giveaway!!

April 5, 2011 by Aliesha

I’ve always been fascinated by letterpressed stationary, and I remember joking a few years ago that my daughter would probably be able to letterpress her own wedding invitations.  Well, letterpressing at home has recently become quite attainable, thanks to a sweet tool from Lifestyle Crafts called the Epic 6.

I’m going to show you how I made a couple of things with it, but believe me, these will not be the last letterpressed projects you see on Feathers in Our Nest!

Start by selecting the letterpress plate you wish to use.  I used the Blossoms Printing Plate.  Place your letterpress paper (heavier weight than normal cardstock) on your letterpress tool and align using the guides.

Apply a small amount of letterpress ink (available in a ton of fun colors) to the ink base.

Using the ink brayer, roll the ink around the base so you get a nice even coat on the brayer.  Using the adhesive sheets, stick the letterpress plate onto the letterpress tool.  Apply ink to the plate using the brayer.

Fold up the letterpress tool, and roll it all through the Epic 6.

Look at how beautiful the letterpressed design looks!  This is the perfect base for a card, or for another project like the next one I’ll show you.  But first, let’s finish this card.

The Epic 6 can also be used to die cut using the cutting platform.  I used the Nesting Scallops to cut out three circles for this card.

I then letterpressed each circle with a design.

You can then either glue your circles to the front of the card or use foam adhesive dots so they stand out from the page and have a little dimension.

The next project I want to show you is quite similar to make, but is really fun to use as a gift idea or party favor.

To make this cello bag header, simply follow the steps above until you get to the card base.  Then, use the Nesting Scallops to cut out a large circle.  Score the circle down the middle and fold.  Punch holes through the header and the bag, and tie it up with some cute baker’s twine.  Fill with some fun seasonal candy for a cute “just because” gift!

I know you all probably want your own Epic 6 Tool and Letterpress Combo set now… so head on over to SIMPLE to read my review and ENTER TO WIN your own! 

*Disclosure: I was provided with an Epic 6 Tool/Letterpress Combo and accessories to showcase and review.  All opinions expressed are my own.

Filed Under: crafts, projects, reviews, step-by-step

  • « Previous Page
  • 1
  • 2
  • 3
  • 4
  • 5
  • 6
  • …
  • 8
  • Next Page »
  • Email
  • Facebook
  • Instagram
  • Pinterest
  • RSS
  • Twitter
About Us

This blog shares our family's story and our journey from newlyweds to a family of seven. We share milestones, we share struggles, we share sweet memories, and we share about our Savior. Keep reading...

FACEBOOK

NEWSLETTER

Subscribe to our super-fun weekly newsletter! Enjoy exclusive content & fun bonuses!

* indicates required

Archives

INSTAGRAM

PINTEREST

Visit Aliesha @ Feathers in Our Nest's profile on Pinterest.

Popular Posts

newborn sleep routine

10 Tips for Establishing a Newborn Sleep Routine

What I Buy at Aldi

What I Buy at Aldi {Real Food}

essential oil blends

Essential Oil Blends – What Works for What?

DIY Citronella Candles {Keep Mosquitoes at Bay!}

Dream Diaper Bag: Review of Lily Jade Shaylee

Baby Basics: Guide to the Products I Love

Perfect Cold Brew Coffee at Home! Easy DIY recipe using a French Press | Feathers in Our Nest

Perfect Cold Brew Iced Coffee

See Other Popular Posts...

About Feathers in Our Nest

At Feathers in Our Nest, you can expect to find delicious recipes, homemaking tips, practical advice for frugal living, resources for those who are in ministry, inspiring links, and cute photos and stories about our children. You can browse older posts by checking out the Tips & Tutorials Page or the Recipes Page. Thanks for visiting! Read More…

  • Email
  • Facebook
  • Instagram
  • Pinterest
  • Twitter

Recent Posts

Easter Family Devotions | Feathers in Our Nest
Gospel Centered Books for Older Kids | Feathers in Our Nest
Gospel Centered Family Devotionals | Feathers in Our Nest
Gospel Centered Story Bibles | Feathers in Our Nest
Gospel Centered Picture Books | Feathers in Our Nest

Popular Topics

baby baking whole grains birthdays books bread breakfasts Christmas cooking Cordelia crafts deals decorating desserts essential oils everyday fall family food friends frugal living giveaways health and beauty healthy eating holidays homemaking hospitality house Jude main dishes marriage menu monday milestones ministry parenting photography pregnancy projects recipes reviews she {hearts} it sponsored Tad travels Vera worth repeating

Copyright © 2025 · Foodie Pro Theme by Shay Bocks · Built on the Genesis Framework · Powered by WordPress

Sign up below to join the Feathers in Our Nest email list!
Every Friday, you'll get exclusive content: the latest posts, recipes, photos, & more!
Your information will never be shared or sold to a third party.